A mixed media piece

A mixed media piece

Friday 27 November 2020

Retro Over on the Tando blog

 Hi everyone Dee here with my post for Retro week, I hope you are all keeping safe and managing to get some craft time in. 


I have gone right out of my comfort zone with this tag using Tim Holtz stamps and Cosmic Shimmer pigment paint and matt paint. Andy skinners transfers from Creative Expressions.


A Tando Tag was the perfect substrate for this project.
Thank you for popping by
Keep Safe!
Cheers Dee x


Saturday 21 November 2020

Anything goes over at Tando creative

 Hi everyone I hope you are all keeping safe and are not to worn down by the restrictions. I have created a Christmas's tag for my project this week.


Using a Tando creative tag I gave it a coat of Gesso followed by sparkle paste from #creativeexpressions and #Tandostencils mini snowflake. I also used a large snowflake from Tando which I gave a coat of gesso followed by sparkle paste. Once it was all dry I spritzed with Airless misters from #Cosmicshimmer fabulous sprays.


Thats all for now folks stay safe 
Cheers Dee x

Wednesday 18 November 2020

A Box for my earrings using #Mitform_castings

I made a box for my earrings as my dressing table is always full of them and i am always worried i will lose one. I created this box using an old Turkish delight wooden box which I painted with 
Fresco Finish Chalk paint . 


I used Seth Apter's midnight paint with Boro boro and space cadet and inside I used Pumpkin soup.
Once dry I used a large clock stencil from Deli art. Using translucent modelling paste I put it through the stencil when partially dry I scraped it back so the image was distressed.


I used piece of wall paper to apply pumpkin soup to the base randomly along with Boro boro to the box. 


Next a lot of dry brushing with Deco Art Tinting base I kept going till I was happy with it.


The centre piece is a #mitform_castings large cog on which I used #Decoart antiquing cream in patina black and white. I followed this with #Decoart fluid acrylic Prussian blue and Quinacridone gold & Yellow transparent Iron oxide. 


I hope you all enjoyed the project.
Thanks for popping by.
Cheers Dee x


Friday 13 November 2020

Crackle week over at Tando creative


Hi everyone Dee here with my post for Crackle week. I hope you are all keeping safe and are not getting stir crazy with the latest lockdown. I have taken to walking every day. I and am so excited that next month we will be having a new member of the family join us it is a Springador puppy who will be joining me on my walks when she is old enough. I begged pleaded even shed a tear to be allowed this lovely pup so really can't wait. 


This is my piece for this weeks theme crackle I used one of Tando's long tags love these tags.
I stamped x 2 the flower from Tim holtz dearly departed stamp set and used his tissue paper. I stuck it all down with collage medium and gave it all a coat of medium.


I can't remember where the butterfly stamp was from but thought it set it off rather nicely. I used a antiquing cream of brown from stampendous then followed with a patina one from Deco art over the whole tag. I knocked it all back with a soft cloth wetting it in places.


A close up of the crackle.


I gave it all a touch of bling with some treasure gold. I hope you all have enjoyed my piece thank you for popping over to check it out.

Friday 16 October 2020

La Mode for Creative Expressions


 La Mode


You will need:

CSMCPVAN             Cosmic Shimmer Matt paint Vanilla

CSMCPSHALL          Cosmic Shimmer Matt Paint Shallow sea

CSASPPPRU             Andy Skinner pigment paint Prussian Blue

CSASAPPUMBER    Andy Skinner pigment paint Raw Umber

CSASAPPGREY        Andy Skinner pigment paint Payne’s Grey

CSASAPPYEL           Andy Skinner pigment paint Yellow Iron Oxide

CSARESPAST          Andy Skinner resist paste

CSASGGLUE            Andy Skinner Quick grab glue

ADHA4                     Creative Expressions double sided card

CER017                    La Mode Sam Poole 

CER019                    L’alteration

41002                Creative Expresions primrose card

40980                      Creative Expressions Coconut card

KRAFTCARD            Creative Expressions Kraft Card

CSSERUST               Cosmic Shimmer Special Effects Rust paint kit 

CESMOOTH            Creative Expressions Smoothies


Other Tools needed


Black Archival ink 

Stamping block

Scissors

Lace

Buttons

Cream card

Sewing Machine

Foam backed sticky pads

Stick on Pearl seed painted with Prussian blue


Step 1


Cut your coconut card to size 4.25 inches by 6 inches then give it a base coat of Payne’s Grey and Raw Umber 50/50. Once dry use Andy skinners resist paste where you wish the base to show through. Follow this with vanilla matt chalk paint and heat set, then take a soft cloth and rub back over the resist areas to remove the paint in the resist areas.
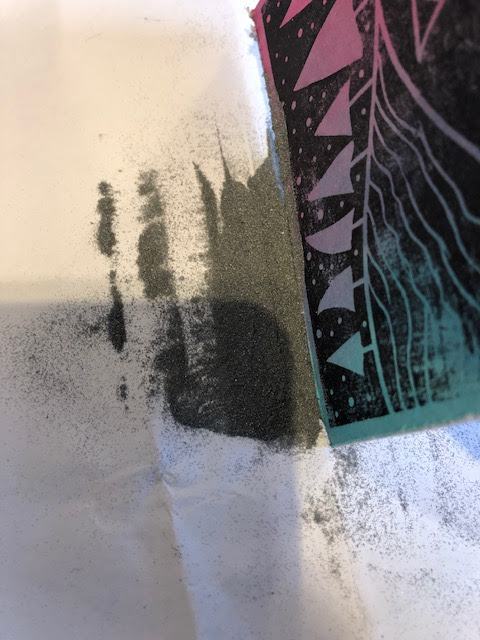


Step 2


Ink up the le mode stamp with Black archival Ink taking care to miss the edges you could mask them out if you wish, I didn’t as I don’t mind the odd hint of the boarder showing through. Once dry give a watery wash of Shallow sea matt paint and heat set reapply till happy making sure it is very watery. At this stage I added some stitching on the righthand side.


Step 3 


Once you have stamped the main image stamp out again along with the top part of the L’alterations stamp on Primrose card then fussy cut the images out. Run a distress tool around the edges to create an uneven edge.  Use your smoothie to apply a mix of Yellow iron oxide and raw umber together 70 yellow / 30 umber and apply to the edges of the base card and your cut out images follow with Prussian blue. Tip test out how to on scrap card so you don’t overload it.
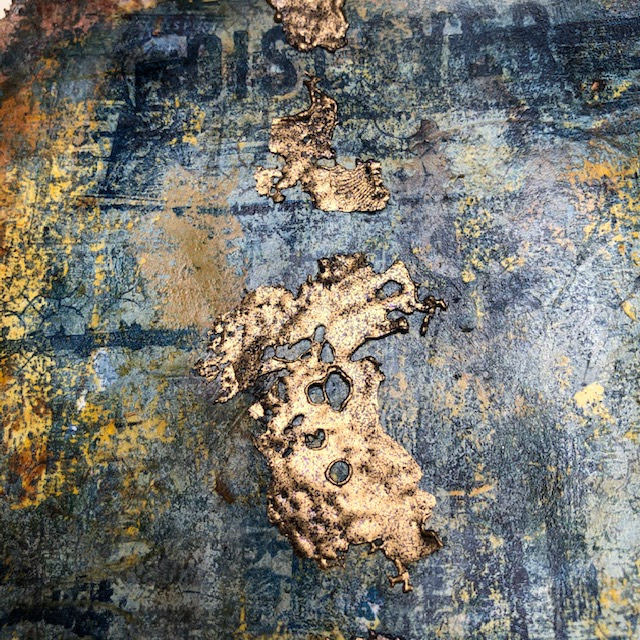


Step 4


I found 3 black buttons in my stash and thought I would give them a rusty finish. I applied Cosmic shimmers special effects rust to them. This product us amazing as it has quite a textured finish to it, I dried each colour before applying the next colour and I used a stipple brush to apply.


Step 5


Apply the double sided card to your project and mat to the kraft card, using a distress tool and repeat the process that you used on the main project. Apply a strip of double sided card to the left hand side of your main image and stick down the lace. Follow this by attaching your buttons and the tittle piece from the L’alterations stamp.


Step 6


Finally attach your corsets with the double sided pads so they sit proud of the base image and your 3 painted seed pearls.


Friday 9 October 2020

Skulls Creative Expressions Challenge

Creative expressions have challenged us to do a skull project this month if you go to https://www.facebook.com/groups/242478146946385 you will see the challenge so 
this week it is skulls.


I love this skull mould so I created this tag with using Andy's Skinners pigment paints and my lovely skull.


Creative Expressions Andy Skinner Cracked up Stamp


I used a MDF tag from the tag set from Creative expressions


I finished with Funky Cold Patina embossing powder and gold embossing powder.
I hope you all enjoyed my make for the challenge.

Cheers Dee


Tuesday 6 October 2020


Hi everyone Dee here with 3 tags using Andy's transfers Alchemy Plus set these are fabulous sets and can be used over different backgrounds. For these three I used small atc boards which I backed onto tags which I had used creative expressions colour clouds along with Andy creative expressions paints. Andy's Pebble Beach stamp was also used on all the tag backgrounds.


Tag 1


Tag 2


Tag 3


I hope you all like the tags 
Cheers Dee x

Products

Stamps 

Transfers


Thursday 1 October 2020

Prey over on Andy Skinners Blog

 Hi everyone, here is a project I did using Andy's pray stamp and his Redemption stencil. I cut out a large arch out of grey board and put texture paste through the redemption. I used a broken compass that i had made form a mould.


Tando grey board was used to do the frames and the centre piece was a Tando creative clock hand that I had coated with grit paste. I made the background papers using a gel plate and creative expressions pigment paints


The wings were made using a mould along with the bones at the bottom of the piece. I painting the wings with raw umber and gold paint.


Rangers crackle accents were used at the base of the windows. I used gems to decorate the clock hand and acrylic washes on the clock hand .


The top of the arch was again painted with acrylic paint and gilding paste was used to highlight the words.
I hope you all enjoyed my post and thank you for taking the time to pop by.
Cheers Dee x

Products


Stamps 

Stencils


Friday 24 July 2020

Stencils over at Tando Creative

Hi everyone Dee here I hope you are all keeping safe & well. I have a sneak peak of my latest post over on the Tando blog that went live this morning. why not pop over and take a look at what the team has created.

Keep safe and well

Cheers Dee


Friday 17 July 2020

Anything Goes Over on Tando Creative


Hi everyone Dee here it my turn over on the Tando blog and i am sharing the beautiful houses that Di showcased on Hochanda on Monday. Why not pop over to the Tando blog and see what the team have created this week.


Cheers Dee x


Friday 10 July 2020

Butterfly's over on the Tando Blog


Hi everyone, Dee here with my latest post over on the Tando blog the theme is yep! Butterfly's 
lots of layers with this one!


Why not pop over and check out what the team have created.
Cheers Dee x


Sunday 28 June 2020

A play with Seth Apter Stamps Ice and skins

Hi everyone Dee here again with a couple of journal pages created using # Seth apter # PaperArtsy paints # Izink Ice by Seth Apter & #WoW embossing powders . The blue one has got a Gold embossing skin on it love these. I used PaperArtsy paints to create the background.


The one below was a journal page that I had stamped a studio light stamp into and a random bit of paste through a stencil. I wasn't happy with it so out came the fresco paint and i started layering up and more stamping. I still wasn't happy so used the Ice it picked up the scribbling etc that i had sone beneath the paint. loved it 


More Photo's of the top page


Distressed edges with a touch of # WOW  Weathered gold embossing powders.


Close up of the skin


I hope you liked the post really love the ice glaze its fabulous you really should try it.
Keep safe cheers Dee x


Tag using Andy Skinners new Stamps and Stencils # Creative Expressions


Hi everyone Dee here I hope you are all well and keeping safe. We all seem to be having a lot of time to craft these days husbands permitting!!! I created a tag using Andy's new releases from # Creative Expressions. I started with the a MDF tag and gave it a base coat of gesso. 


Next I stamped the Tag with Andy's new Stamps both pebble beach & stone wash using Watering Can Archival ink. 
Strata paste was put through the Mandela stencil the whole stamp was given a coat of Matt chalk paint followed by washes of the following Prussian Blue, Quinacridone Gold & Yellow Iron Oxide Pigment paint. 
I used the stencil again this time using a sponge and used Prussian blue. 
I had triple embossed the Pebble beach with silver embossing powder onto black card. I attached this to random area's. 
A coat of matt medium was used over the painted tag, once dry I followed this by applying the transfers from Poe Diversity sheet.


A sari ribbon was used to finish it off.
I hope you all enjoyed my Tag
Stay safe Cheers Dee x

PRODUCT USED 

MDF Tag
warm white matt chalk paint 
Strata paste 
Andy's new Stamps both pebble beach & stone wash 
Watering can Archival
Prussian Blue, Quinacridone Gold & Yellow Iron Oxide Pigment paint
Cosmic Shimmer silver embossing powder
Cosmic Shimmer Quick grab glue
Gilding polish Silver Dream
Transfers Poe Diversity

Creative Expressions Christmas Cards

Hi guys Dee here with a couple of cards for # Creative expressions, I know not my normal style but we have to push those boundry's. I have done a step by step for both cards.

CARD 3 
CHUBBY ROBIN CARD JGS729
By Dee Adams
STEP BY STEP


I took a piece of coconut card and inked it up with Colour Cloud Decadent Wine & Decadent Teal using a smoothie applicator. I just blended the inks onto the card in no particular way 
 

 I placed the stamp JGS729 Chubby Robin onto the Woodware stamp press WW2977 and inked it up with
Archival ink. I wasn't looking for a strong print as I didn't want the black to dominate the card & I wanted the background to show through the black ink. 


I wasn't looking for a strong print as I didn't want the black to dominate the card & I wanted the background to show through the black ink. I just went with the first press if you want the black bolder just re print the stamp making sure you have fixed your card down prior to starting.
 

Next I cut the print out leaving a boarder then distressed the edges with a distress tool. I poured a pile of detailed silver embossing powder CSDEPSILV onto a sheet of scrap paper. I ran an embossing pad round the edges of the card and then run it through the embossing powders creating a silver frame once heat set.


To finish off Cosmic shimmer Twinkles Aurora CSTAUR were applied to random clusters of berries


This was then placed onto a card of 6 x 6 card and stuck down with Cosmic Shimmer Andy Skinner quick grab glue CSASGGLUE. 

Here's my second card


Card 2 
Robin and Holly
By Dee Adams
Step by Step


I started with a piece of white cardstock and using a smoothie CESMOOTH I blended the inks Decadent Teal CSPMCCTEAL and Chic Aubergine CSPMCCAUBER across the card.


I then stamped the image from the Robin and Holly stamp JGS728 x 2 using the Woodware Stamp press WW2977 and Black Archival ink.


I then fussy cut out the top part of the Robin and glued it over the base card. Using Opal Blaze Touch Tip Teal Raspberry CSOBTTTEAL on his feathers. I cut into a square to fit a 


Next I used strata paste CSASSTRATA round the edges of the card I love this as it has pieces of mica in so these catch the colour and give it bits of translucency and dry. 


Put Cosmic Shimmer Icicle Blue Sparkle Texture Paste CSPASTSPICICLE ontop of the strata paste ensuring the strata paste has dried.


Once dried go back in with your smoothie to blend the colour into the edges don't worry as the sparkle will shine through.


Edge the sides with embossing ink and follow with Cosmic Shimmer detailed silver embossing powder CSDEPSILV and heat set.


Finally this was matted onto black card and attached onto a white 4 x 4 card.

I hope you all enjoyed the step by steps thanks for stopping by and let me know how you get on if you try it out.

Stay Safe 

Cheers Dee x